

Our latest brew day is for our Vienna Lager recipe which unfortunately didn't go entirely to plan, with our pH meter deciding to pack it in after taking our first sample. Read on to find out more about how it went down.
Pre-Brew Day Setup
- We brew at night time, so we start our brew day setup the night before by collecting the brewing water into our 35L BrewZilla and Digiboil for mash and sparge water respectively.

- 22L of mash/strike water in the BrewZilla as per the recipe.

- 12L of sparge water into the Digiboil - a bit more than Brewfather states in the recipe but we like to have a bit extra just in case.

- We adjust our mash and sparge water with magnesium sulphate and calcium sulphate. We also use calcium chloride but it wasn't required for the water profile for this beer as our water source already has sufficient levels of chloride in it already.

- The last thing we do is acidify our mash strike water with phosphoric acid

Brew Day - Grain Milling
- Now the Brew Day is underway! First step is to measure out 40g of Carafa Special III grains - since we ordered 100g

- We added the rest of the grains into our mill and crushed them into the bucket underneath

- Current gap size is 1.35mm - which is considered fairly coarse. You can see the husks are still relatively intact which aids in filtration and improves water flow through the grain bed.

Mashing In
- Mashing in and stirring the grain in with our drill attached mash paddle

- We add the grain in several stages to help make it easier to stir into the mash water

- Strike temperature ended up a bit lower than our expected 67°C

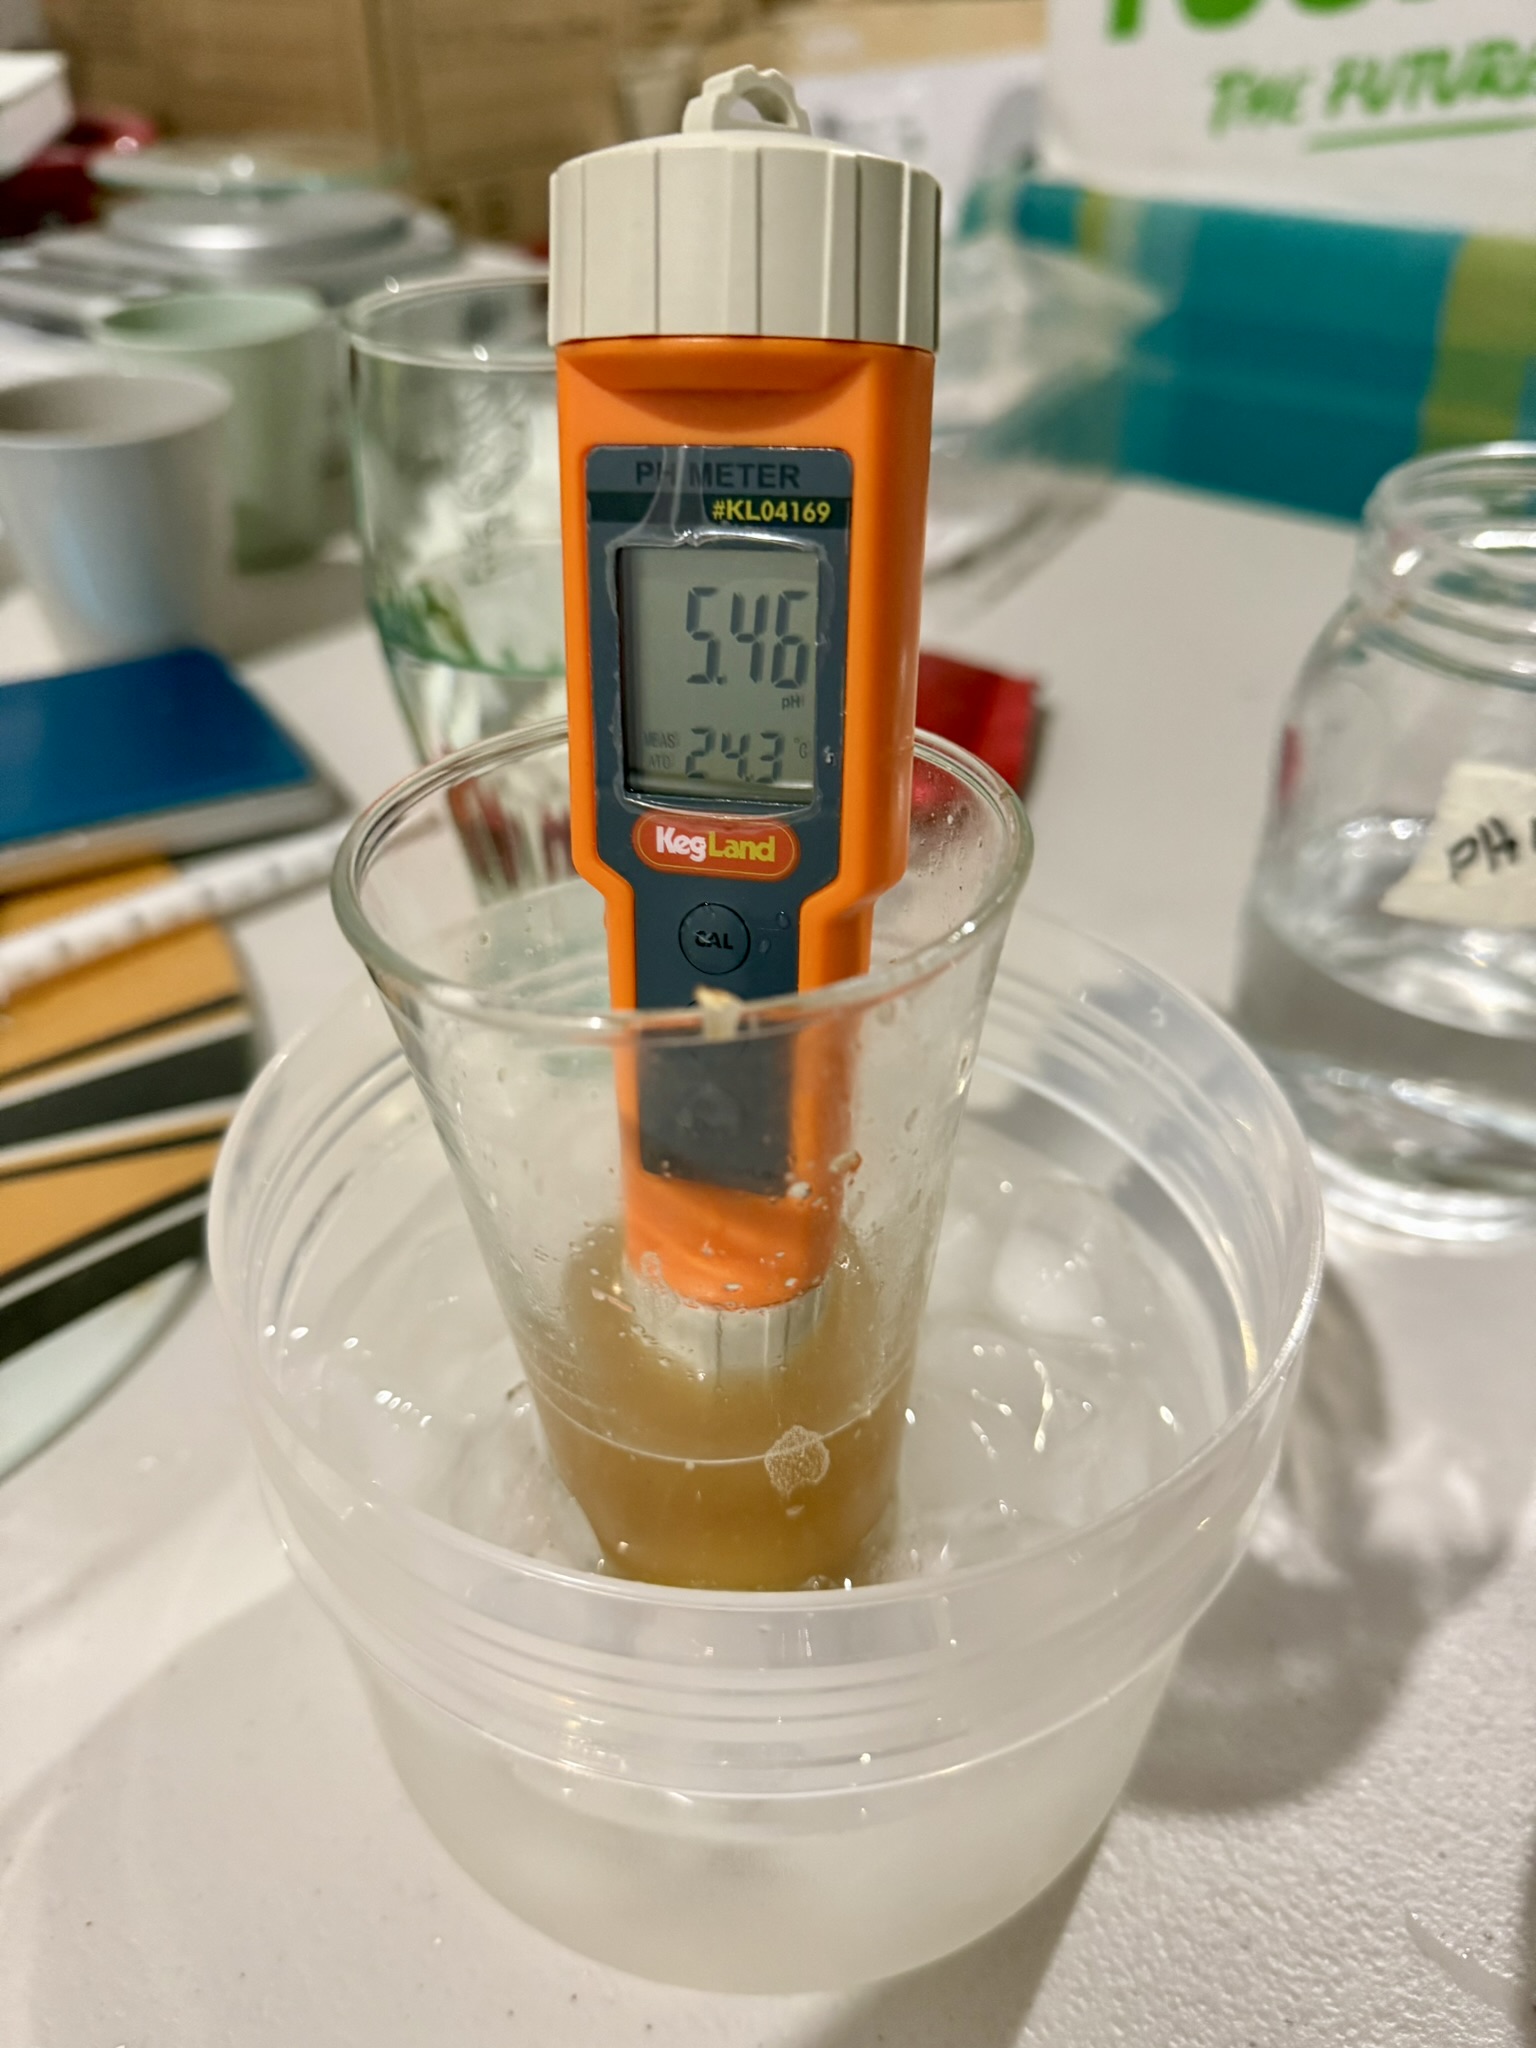
pH Meter Dramas
- After mashing in and leaving the grain bed to settle for 10 minutes, we took our first pH reading of 5.46, but little did we know this would be the last pH reading we would be able to take for this brew day
- We added 1mL of phosphoric acid to try and get the pH a bit lower and closer to the target of 5.2

- This is where things with our pH meter went haywire, with skewed readings. As you can see below, we've got a reading of 13.51 in the pH 4 buffer solution we'd used minutes earlier to calibrate the meter.

- We tried everything - replaced the electrode probe with a brand new spare one that we had, tried recalibrating, removing the battery, everything, but we couldn't get this thing working again. Guess we're flying blind in regards to pH for this one!

- This obviously meant we couldn't take any more pH readings throughout the brew day.
- Our only real concern here was that we couldn't accurately adjust the pH of our sparge water - it was actually when we were measuring our cold sparge water that we started having problems with the meter.
- The problem started with the meter reading around 3.2 for tap water with a tiny amount of acid added. Even after adding more tap water to bring the pH backup, the pH was barely moving, and as it turns out, was likely because the meter was about to fail.
- So we have no idea really what our sparge water pH was, so hopefully it doesn't have a detrimental impact on the finished beer
Mash Recirculation
- Recirculation underway and the wort took on a beautiful dark brown colour and began clearing quite quickly

The Sparge
- We lifted the grain basket and began sparging with our pre-heated water from the Digiboil

- We continued sparging until we hit our target pre-boil volume of 28L

The Boil
- While waiting for our BrewZilla to come up to a boil, we measured out our first hop addition - 15g of Warrior hops

- We also took a pre-boil gravity reading - the first one of 1.054 was unusually high (target was 1.045)

- So we took a couple more measurements - this one is much closer to what we're expecting

- Hot break forming just before hitting boiling point. We stir the hot break back in and don't remove it like some others do.

- With 10 minutes left in the boil we added 10g of yeast nutrient and a half whirlfloc tablet

- 26g of Saaz hops were also added with 10 minutes remaining in the boil

Post Boil Activities
- At the end of the boil we recirculated the wort with the whirlpool arm attachment and began chilling with the stainless immersion chiller

- First post-boil gravity reading was a bit lower than expected based on the pre-boil reading

- Recipe expected post-boil gravity of 1.050, but based on our pre-boil reading of 1.044, this is around where the post-boil gravity should be

- Wort cleared up very quickly whilst chilling thanks to the whirlfloc

- Confirmed original gravity of 1.048 with floating hydrometer

- We got the wort down to around 30°C with the chiller before transferring to the fermenter.
- We continued to chill the fermenter down to 18°C overnight before pitching the single packet of W-34/70 yeast the next morning

- Fermentation was underway around 12-14 hours later
Related Articles


No comments:
Post a Comment