
The Munich Helles style has been sitting on our To Brew List for some time now, so it's about time we finally got around to designing the recipe (and brewing one!).

The Munich Helles style has been sitting on our To Brew List for some time now, so it's about time we finally got around to designing the recipe (and brewing one!).

Here's a quick run down and photo dump from our most recent BrewZilla brew day (night). Details of the recipe can be found here.
.png)
For our latest brew. we've taken inspiration from New Zealand based malting company, Gladfield - as our local home brew shop (41 Pints of Beer) sell mostly Gladfield malts. We've got a bunch of leftover hops from previous brew days we need to use up, so we're going to take the grain bill from the Gladfield recipe, and adjust the hop schedule to use up our leftovers.

We're big proponents for water chemistry adjustment in brewing. Water is, after all, the biggest single ingredient used when making beer, and there's no doubting the science and research behind the role it plays when making high quality beer.

No doubt the most popular use for kegerator setups at home is to have delicious beer readily available and served from a tap - but hey, if you're reading this you probably already know that kegerator's are awesome. What you may be wondering though is the same thing we were researching a few months ago, and that is how you can run more highly carbonated beverages like soda, premixed spirits or hard seltzer in a kegerator system without pouring loads of foam every time you open the tap.

Our first attempt at a hard seltzer has now been kegged and conditioning for a number of weeks, so we wanted to share the results and highlight a few points from our seltzer-making experience.

Here's a quick recap/run down on our second attempt at brewing the Stone & Wood Pacific Ale. Check out our revised (version 2) recipe that we used for this brew.

Here's an updated recipe for our clone of the infamous Stone & Wood Pacific Ale.
.png)
We've previously shared the details of our 3D printed beer tap decals that we had installed on our converted fridge/kegerator with a simple decal holder that attaches to each of the taps.
AI is all the rage at the moment, and in the homebrewing community many content creators are leveraging the power of artificial intelligence to generate things like beer recipes. So for no reason other than my own curiosity and entertainment, and in keeping with the theme of this site, I thought I'd ask ChatGPT to write a satirical review for a fictional piece of homebrewing equipment. The results did not disappoint.

KegLand have recently released the Sergeant Sparge Head - a wort sprinkler aimed to integrate with their range of BrewZilla all-in-one brewing systems.

This has been on our To-Brew list for some time now, and we've finally gotten around to trying our hand at making a hard seltzer. Here's a quick run down on how it went.
.png)
In order to leverage the many benefits of pressure fermenting, a key piece of equipment that is required is a spunding valve. The word "spunding" is German, and translates roughly to "bunging" and essentially means to close up or seal.

Sometimes relatively simple beers can be just as satisfying, and potentially even more thirst-quenching than the more complicated (and expensive) hop forward styles like IPA's. We wanted a simple beer to add to our new outdoor kitchen triple-tap setup, and decided to give the Kissaki Japenese Lager from All Inn Brewing Co a try.

After using your BrewZilla (or any other vessel/kettle used for brewing), you may notice some brown staining occur on the bottom of the unit where the heating elements are located. This commonly referred to as "beer stone" or calcium oxalate and is a common issue related to brewing.

As a homebrewer you'll typically want to know how much alcohol is contained in the latest batch of precious beer that you have fermented, and thankfully the process for working this out is fairly simple.

The following review was forwarded to us from Kenneth, so we've decided to publish it here in addition to our own review of the same Keg King Apollo Titan 30L stainless steel conical fermenter.

KegLand have recently released an interesting video on YouTube claiming that the silicone O-rings they have been including with their corny kegs as the seal for the main keg opening have been tested and believed to allow significant amounts of oxygen to leech through them and into the keg.

As part of a recent new home build, I was fortunate enough to be able to integrate a new kegerator setup into the outdoor kitchen located in the alfresco area at the rear of the house.

Following on from our recently published All About Brewing Hard Seltzer at Home article, here is our hard seltzer recipe and step by step guide for making it.

We love beer (obviously), but we also enjoy a bit of variety and having other beverages available on tap - not just for us, but for others to enjoy as an alternative to beer. A popular option is spirit and soda mixtures like bourbon and cola, or our go to option which is Canadian Club and dry ginger ale. There is another option that's become increasingly popular in the past year or two and that is hard seltzer.

2022 saw the release of LalBrew NovaLager from Lallemand Brewing - a hybrid lager yeast strain offering the benefits of a classic lager yeast without some of the drawbacks generally associated with using them.

We were recently invited by Spike Brewing to submit another article to feature on their website on the hot topic of kegging. Our Beer Keg Guide is an in-depth dive into the world of kegging beer - arguably the best way to package and serve your beer at home. We look at the different types of kegs, what benefits you can expect to reap from kegging compared to bottling, and provide some detailed information on what you'll need to get started with your own kegging setup.
.png)
Following on from our recently published Hazy Pale Ale Recipe Creation Guide - here's our Hazy Pale Ale recipe.

Hazy Pale Ale's are the latest trending beer style, with craft beer lovers craving heavily hopped and flavour-packed beers, without all the alcohol and heaviness you usually get with styles like Hazy IPA.

When we set out to design the recipe for this beer, we made a conscious decision to focus on using hops that would give a flavour profile more resinous and piney than outright fruit, or citrus - and that's exactly what we got.
.png)
The process for brewing beer is a combination of many steps - and brewing high quality craft beer akin to what you can buy from commercial craft breweries is the culmination of doing many of these many steps right. For us this was always the goal when we started brewing our own beer - to make something that to us tasted just as good as what we could buy from a craft brewery.

We put together our Amber Ale Recipe Creation Guide and Amber Ale Recipe quite some time ago, and with the weather starting to cool down here with Autumn finally settling in, we decided it was time to bring this one to life.
 |
| Our Cream Ale/International Lager in the Craftd Freddy glass |
Straight off the bat, in terms of overall quality, balance and flavour profile, this is probably the best beer we've made to date. Constant tweaks to water chemistry, in particular making sure our mash and sparge pH levels are within the 5.2 - 5.6 range has made all the difference in eliminating all off flavours our palate is capable of detecting. We also made a conscious decision to really strip things back to a really simple and straightforward recipe, without loads of hop flavour like we've been doing in many previous brews.
In terms of being a "cream ale" - it arguably is, however we've found it more closely resembles an international pale lager. With the use of lager yeast (W34/70), it technically is a lager, but also the classic noble hop of hallertauer mittelfru, some corn based adjunct (maize) and a bit of simple sugar (dextrose). To our taste it came out very much like a Heineken. A true cream ale would perhaps be better suited with some new world hops and a clean fermenting ale yeast like US-05 - which is what we'll try next time. If you look at the BJCP guidelines for the two styles (international pale lager and cream ale), you'll notice there's quite a bit of overlap between them anyway.
We're super happy with how this one turned out even if it wasn't exactly how we had planned, but sometimes accidents and missing the mark aren't an entirely bad thing!
Let's dig a bit deeper into how it turned out;
Super pale in colour and by far the clearest beer we've ever brewed, it's certainly appetising to look at. The whirlfloc tablet worked wonders and this is something we'll be including in all future brews with the exception of course of hazy styles. It needed a good few weeks to drop fully clear in the keg, but we’re pleased with where it’s at without needing any additional cold side finings. A nice clean white foamy head (perhaps a little too large on initial pours from a warm kegerator tap) is apparent and has some good staying power.
There is not a huge amount of aroma as you'd expect from a beer like this - since the grain bill is fairly neutral and there isn't a great deal of hops at play. It's all in balance as it should be, but you do get a slight hint of the lager yeast on the nose up front.
This one is very easy drinking and to our taste has no noticeable off flavours. It was fermented warm (around 20C) and under pressure (around 10psi) which certainly worked to suppress any esters and off flavours from developing. We were particularly worried about the warm fermentation termperature imparting some off flavours, but the W34/70 yeast certainly wasn't phased by this, and more than likely having the fermentation happen under pressure helped too.
The yeast profile is very neutral and provides the perfect backdrop for the hallertauer mittelfruh hops to do their thing. As we previously mentioned, there isn't a huge amount of hop flavour, but there is as much as there needs to be to keep the malt and hop flavours in balance. In our opinion the balance is spot on so we'll be keeping this hop schedule as a basis for future recipes.
The malt provides a nice clean, cracker-like platform for the hops - and the overall flavour is very much reminiscent of European lagers.
We plan on entering this beer into an upcoming competition to see how it ranks as an international lager - no one needs to know we actually brewed it to be a cream ale, right? But as we mentioned, the styles have quite a bit of overlap so we're hoping it will do well.
As for changes for next time, the only things we'd change is using a new-world variety of hop, and would also try using a clean fermenting ale yeast like US-05. The base recipe and hop schedule would remain the same.
We were very impressed with the W34/70 yeast and will definitely be using it again. We got a very crisp, clean result and it was turned around just as quickly as a typical ale fermentation - faster actually. The 2 packets of W34/70 finished fermenting in under 2 days!

Our article is a deep dive into the world of water chemistry - something we've covered in other articles on this site, but arguably in not such rich detail. We had a blast researching and writing this article for Spike, you can check it out by following the link below;
It's a Wonderful Waterworld: Your Go-To-Guide for Water Chemistry and pH Balance in Brewing
.png)
At various points of the brewing process there is a requirement to move liquid from one vessel to another. Whether you're brewing with a single vessel all-in-one unit, or have a fully fledged three vessel system in your brew space - you'll inevitably need to move your water, wort or cleaning solution at some point. Sure, you can use gravity but this of course requires lifting large volumes of water so that they're high enough in relation to other vessels to allow gravity to do it's thing, so undoubtedly the most efficient way to do this is to use a motorized pump to do the hard work and heavy lifting for you.
Not all pumps are created equal, however - with base model units having limited flow rate, non-standard fittings and connections, increased risk of clogging, limited serviceability options and are simply more likely to just break down and leave you high and dry (literally and figuratively).
 |
| Spike Flow Brewery Pump - side shot |
Spike Brewing have previously incorporated the March branded pump in their brewing systems, but for several reasons decided it was time to engineer and manufacture their own in order to address a number of shortcomings with the March and other similar brew pumps available on the market.
The end result is the Spike Flow Brew, and with thanks to Cheeky Peak Brewery, we're one of the first to get our hands on one for a hands-on, in depth review so let's jump in.
The Flow comes packaged in a bright white box emblazoned with the red Spike logo. As we've come to expect with Spike products, there's plenty of padding to ensure no damage can occur to the pump during transit as well as protective covers over the inlet and outlet to prevent any dust or other material making its way in there.
 |
| Spike Flow packaging |
Taking the Flow out of it's box - and it just looks cool. The black anodized casing for the motor is the perfect back drop for the red Spike logo and chrome clamps to really pop out against. It comes fully assembled and ready to go - though you will need some additional attachments that aren't included to get it hooked into your brewing system. After lifting the Flow out of it's box for the first time we're impressed by the weight - there's no doubt this thing is built to last - Spike do claim after all that your liver will fail before their equipment does.
Accounting for this weight, at least in part, is the solid steel base with mounting holes/pattern consistent with other pumps on the market. This allows the Flow to be fixed to just about anything you can put a screw or bolt into, giving you flexibility and options with how you implement it in your brewery. It's sturdy enough on the ground, but mounting it to a piece of timber might be a good idea to help prevent it being accidentally knocked or kicked over - because you wouldn't want to damage that pretty paint job, right?
There are two different models available for the Flow, with the only difference between them being the type of connections used for the inlet and outlet. Ours features a 1.5" tri clamp connection at the inlet and outlet points, with the alternative model featuring NPT threads in place of the tri clamps. It's certainly a personal decision as to which option will work best for you, and may depend on what hose connection types you already have but it's nice that two standardized fitting options have been used so no specialist or proprietary adapters are needed to get things going.
Depending on what model you go for will determine what extra parts you need - for the tri clamp version you'll need two 1.5" tri clamps, gaskets and suitable 1.5" fittings with some sort of barb or quick disconnect mechanism for attaching a hose to (one for the inlet and one for the outlet). We fitted some 1.5" tri clamp to quick disconnect attachments to make attaching and detaching hoses super quick and easy - just how you like things to be on brew day.
For the NPT version of the Flow, you will need two female NPT fittings with a barb or quick disconnect attachment that you can connect your hoses to (one for the inlet and one for the outlet).
 |
| Spike Flow with tri-clamp connection |
 |
| Spike Flow with NPT thread connection |
Here's a markup highlighting all the key parts of the Flow. This is of course for the tri clamp version, the NPT version will be the same with the exception of the inlet and outlet connection types;
 |
| Spike Flow Pump with TC connections |
The image above is fairly self explanatory, but it's worth pointing out the incorporated Air Relief Valve (ARV). This feature makes the process of priming the pump as simple as possible. The knurled ARV adjustment knob you can see protruding from the side is what is used to open or close the valve which when opened lets any air pockets (and some fluid) out through the 1/2" barbed ARV drain port, located on the front face. This is a neat inclusion and what's also great is that this valve is on the inlet side of the pump, so there is no pressure applied to this port which allows it to be opened whilst the pump is running without fear of whatever you're pumping being sprayed everywhere. Place a small container or hose under the port if you wish to capture and reuse whatever is drained out as part of the bleed process, then add it back into your source vessel if you wish to minimize wastage.
Some brewing pumps don't feature any sort of bleed or priming valve mechanism at all, and other pumps like the Blichmann Riptide have it on the high pressure side of the pump and facing upwards, meaning purging can result in hot sticky wort (or whatever it is you're pumping) spraying everywhere, including your pump housing. Having this built in with such a simple to use and non-pressurised valve is a great inclusion on the Flow, and means opening it gives a nice manageable stream that can be easily and safely contained.
 |
| Spike Flow ARV |
Spike boasts a best-in-class flow rate of 9 gallons (34 litres) per minute (with the pump running fully opened), and a maximum pressure of 9.5 PSI (with the pump fully closed). Pretty impressive numbers and Spike are claiming 25% more flow than other comparable pumps on the market, but why is this important?
Flow rate is key when it comes to pump specifications, and higher is generally better. This means you can move more fluid through the pump more quickly. This is beneficial for almost every use case in a brewery - like faster movement of wort when transferring between vessels, a more effective trub cone when whirlpooling, faster wort cooling after boiling to help promote cold break, or more cutting power when cleaning your gear using a clean in place (CIP) spray ball. You can throttle back the flow if you need to by implementing a ball valve on the outlet side of the pump which allows you to dial it back for other use cases where flow rate doesn't need to be so high - like recirculating wort when mashing to match your recirculation rate to the flow through the grain bed.
The omission of a flow control mechanism was a deliberate design decision by the Spike engineering team as an integrated valve like what is featured on other pumps will ultimately limit and restrict the maximum potential flow rate of the pump. Plenty of man hours were invested in making the Flow work the way it does, with over a year spent on the pump head design and geometry alone. With this level of planning, design and engineering, it's no wonder they were able to achieve the numbers and specs they did.
The forward facing inlet and vertical facing outlet are oriented for maximum flow and efficiency - as opposed to other pumps which feature an "east-west" style flow path for inlet and outlet that inevitably lead to sharp bends that impede and hinder flow rate and efficiency.
The large 3" tri clamp that joins the motor housing to the cast-steel pump head is another great inclusion and means taking the Flow apart for whatever reason is quick and much easier than other pumps that feature multiple screws to hold the pump head in place. Undoing the 3" clamp and removing the pump head exposes the clever 6-impeller system used by the Flow.
 |
| Spike Flow with pump head removed |
No doubt one of the greatest inconveniences during a brew day is a clogged pump - an annoying and all too common occurrence when dealing with pumping fluids containing relatively large amounts of solids and particulate - like grain, hop debris and other proteins commonly found on the hot and cold side of brew days. Spike have tried to alleviate this problem by including chopping tines in the Flow's impeller system to cut up and break down any large enough particles to all but eliminate the chance of a clog occurring. It's a great idea that would no doubt be well received by any brewer who has suffered through the frustration of a clogged pump half way through a brew day. It will work well with things like T90 hop pellets, but isn't going to be capable of chopping up whole hop cones, so best proceed with caution if using these to ensure they remain contained in your brewing vessel and don't make their way into the pump.
 |
| Still shot from an animation of the chopping tines in action (from Spike website) |
 |
| Spile Flow pump with housing removed |
Removing this 3" tri clamp is all that is needed to clean out the pump, making it really fast and simple to maintain without fear of being unable to put everything back together again, or losing small parts required for reassembly. Some basic cleaning is all that's required to keep your Flow in good working order with no other regular maintenance being needed.
In saying that though, long-term serviceability was obviously a factor when designing the Flow, with the thrust washer and impeller shaft being integrated into a single stainless steel piece. This was another design consideration and point of difference between the Flow and other pumps which have the shaft fixed or integrated into the pump head with a removal thrust washer that can be very easily lost during disassembly. What this means is that after thousands of hours of running time, if the shaft becomes overly worn and needs to be replaced it can be done cheaply and easily without needing to replace the entire pump head like you would have to with a pump head with a fixed shaft attached.
The red on/off switch is located on the side underneath the motor, and features a plastic cover to prevent any fluids from getting in and damaging the circuitry inside. The power cord is permanently affixed, but is 6 feet (~1.82m) in length giving plenty of reach as well.
The motor casing itself is almost completely sealed off too, making it splash resistant with the only ventilation holes being on the rear of the housing. Other brewing pumps we've seen feature ventilation holes all over the motor casing to help keep the motor cool, but also allow water or wort to get inside the housing which is definitely not ideal - we all know that electronics and water don't mix well. It's great that Spike were able to engineer the Flow for continuous use without fear of the motor overheating, and without needing loads of ventilation holes in the casing to do so.
 |
| Spike Flow pump side angle with on/off switch |
We've broken down all the key parts and features of the Flow, but how does it actually perform? We setup a simple recirculation system to our Cheeky Peak Nano-X Fermenter to give it a test run to see for ourselves.
 |
| Spike Flow pump assembled for testing |
Here's our Flow fully assembled for testing and as you can see in the image above, we've got our 1.5" to quick disconnect on the inlet of the pump. We then put a ball valve sight glass on the outlet of the pump with another 1.5" to quick disconnect on top of the sight glass for our outlet hose connection.
A ball valve on the outlet side is the best way to control the flow rate, and a sight glass is a nice addition in order to be able to see what's going on (and coming out) of the pump. Keep in mind though that this ball valve doesn't have to be attached to the Flow itself, you could mount it on the inlet port of your kettle for example to make it easier to access and monitor to make fine adjustments - all that matters is that the flow is controlled somewhere on the outlet side of the Flow and not on the inlet side.
We then hooked up the inlet side of the Flow to the bottom of our fermenter, and put the 13.5mm (ID) outlet hose from the pump back into the top
 |
| Spike Flow pump test rig with Cheeky Peak Nano-X Fermenter |
A very simple setup, but you get the idea and it's certainly enough to give us an understanding of how the Flow performs. After hooking this up we bled the air bubbles in the inlet hose out via the ARV, then powered on the Flow with a 'click' of the on/off switch - and we were surprised at what happened next.
Spike boast about the motor being "ultra-quiet" and they certainly weren't kidding. The Flow seemed to be moving the water through these hoses with much more force and pressure than you'd expect from the gentle hum coming from the motor. Check out the video below to see for yourself.
We left this setup running for a period of time and unsurprisingly the Flow didn't miss a beat. It's certainly got more than enough working pressure to run a spray ball attachment so this is something we're going to look at investing in soon - but there's no doubt that whatever fluid pumping job you need to do in your brewery, the Flow is up to the task.
The Flow has certainly established itself as a premium product, and with that comes a price tag to suit, putting it typically within a few bucks of what we'd consider it's closest competitor - the Blichmann Riptide. It's apparent that plenty of thought has gone into the engineering of the Flow, since it addresses almost all the shortcomings of other pumps on the market - with the only real drawback being the lack of included mechanism to control the output flow. We're OK with this though - including such a mechanism would have ultimately reduced the performance of the Flow, and if you do need to control the output, ball valves are cheap and readily available and most brewers probably already have one in their equipment inventory anyway.
The included ARV is a feature highlight, with a non-pressurised and simple to use drain port for bleeding air out of the inlet line for easy, mess free and safe pump priming.
The Flow looks great, goes like hell and with standardized fitting options, mounting holes and exceptional build quality would without a doubt make a great addition to any brewing system.
Here are the technical specs, taken directly from the Spike website;
• Best-in-class 9 gallons (34 litres) per minute flow rate
• Best-in-class 9.5 PSI of pressure
• Air Relief Valve (ARV) makes priming easy and convenient
• Built in 1/2" drain barb
• 6-vane impeller design optimized for performance and durability
• 304 stainless steel precision machined casting with maximized inlet and outlet ports
• Integrated chopping tines to prevent clogging
• Black anodized motor shell and shot-blasted housing
• 3" Tri-Clamp housing connection for easy disassembly, cleaning and reassembly
• Ultra-quiet, fan enclosed motor: 120v, 60 Hz
• 6 foot power cord
• 9" length x 5" width x 7" height
• Continuous use rated
If you're located in Australia (like we are), the only place to get your Spike Flow Brew Pump is from Cheeky Peak Brewery with a current price of AU$385.
Outside of Australia you can get the Spike Flow directly from the Spike Website (US$229 for the NPT model or US$249 for the tri clamp version) or from other good brewing equipment retailers.

Like many others before us who have setup kegerator systems to have draft beer on tap at home, you inevitably reach a point where you want to have more than one pressure applied to one or more of your serving kegs. Different pressures will allow for different levels of carbonation, with certain styles of beer, or entirely different beverages calling for less or more carbonation. We decided we wanted a keg of Canadian Club & dry ginger ale to enjoy on tap, but this required a much higher level of carbonation since soda has significantly more fizziness than beer.
There are a couple of ways to accomplish this. The first option is to use a dual outlet primary regulator (attached to the CO2 bottle) that will allow for 2 set pressures via 2 separate gas outlet lines. This is definitely a good option, but the dual regulator setup can be quite large, and will potentially make the large gas bottle more inclined to tip over because of the additional weight hanging off one side.

We decided to go for the cheaper option, which is to use inline regulators. A single outlet from the primary regulator is then split into 2 separate lines using a "T" piece and attached to 2 separate inline regulators. Each inline regulator can then be set to the desired pressure. We use approx 13psi for beer, and want to use approx 25psi for our CC & Dry mix.
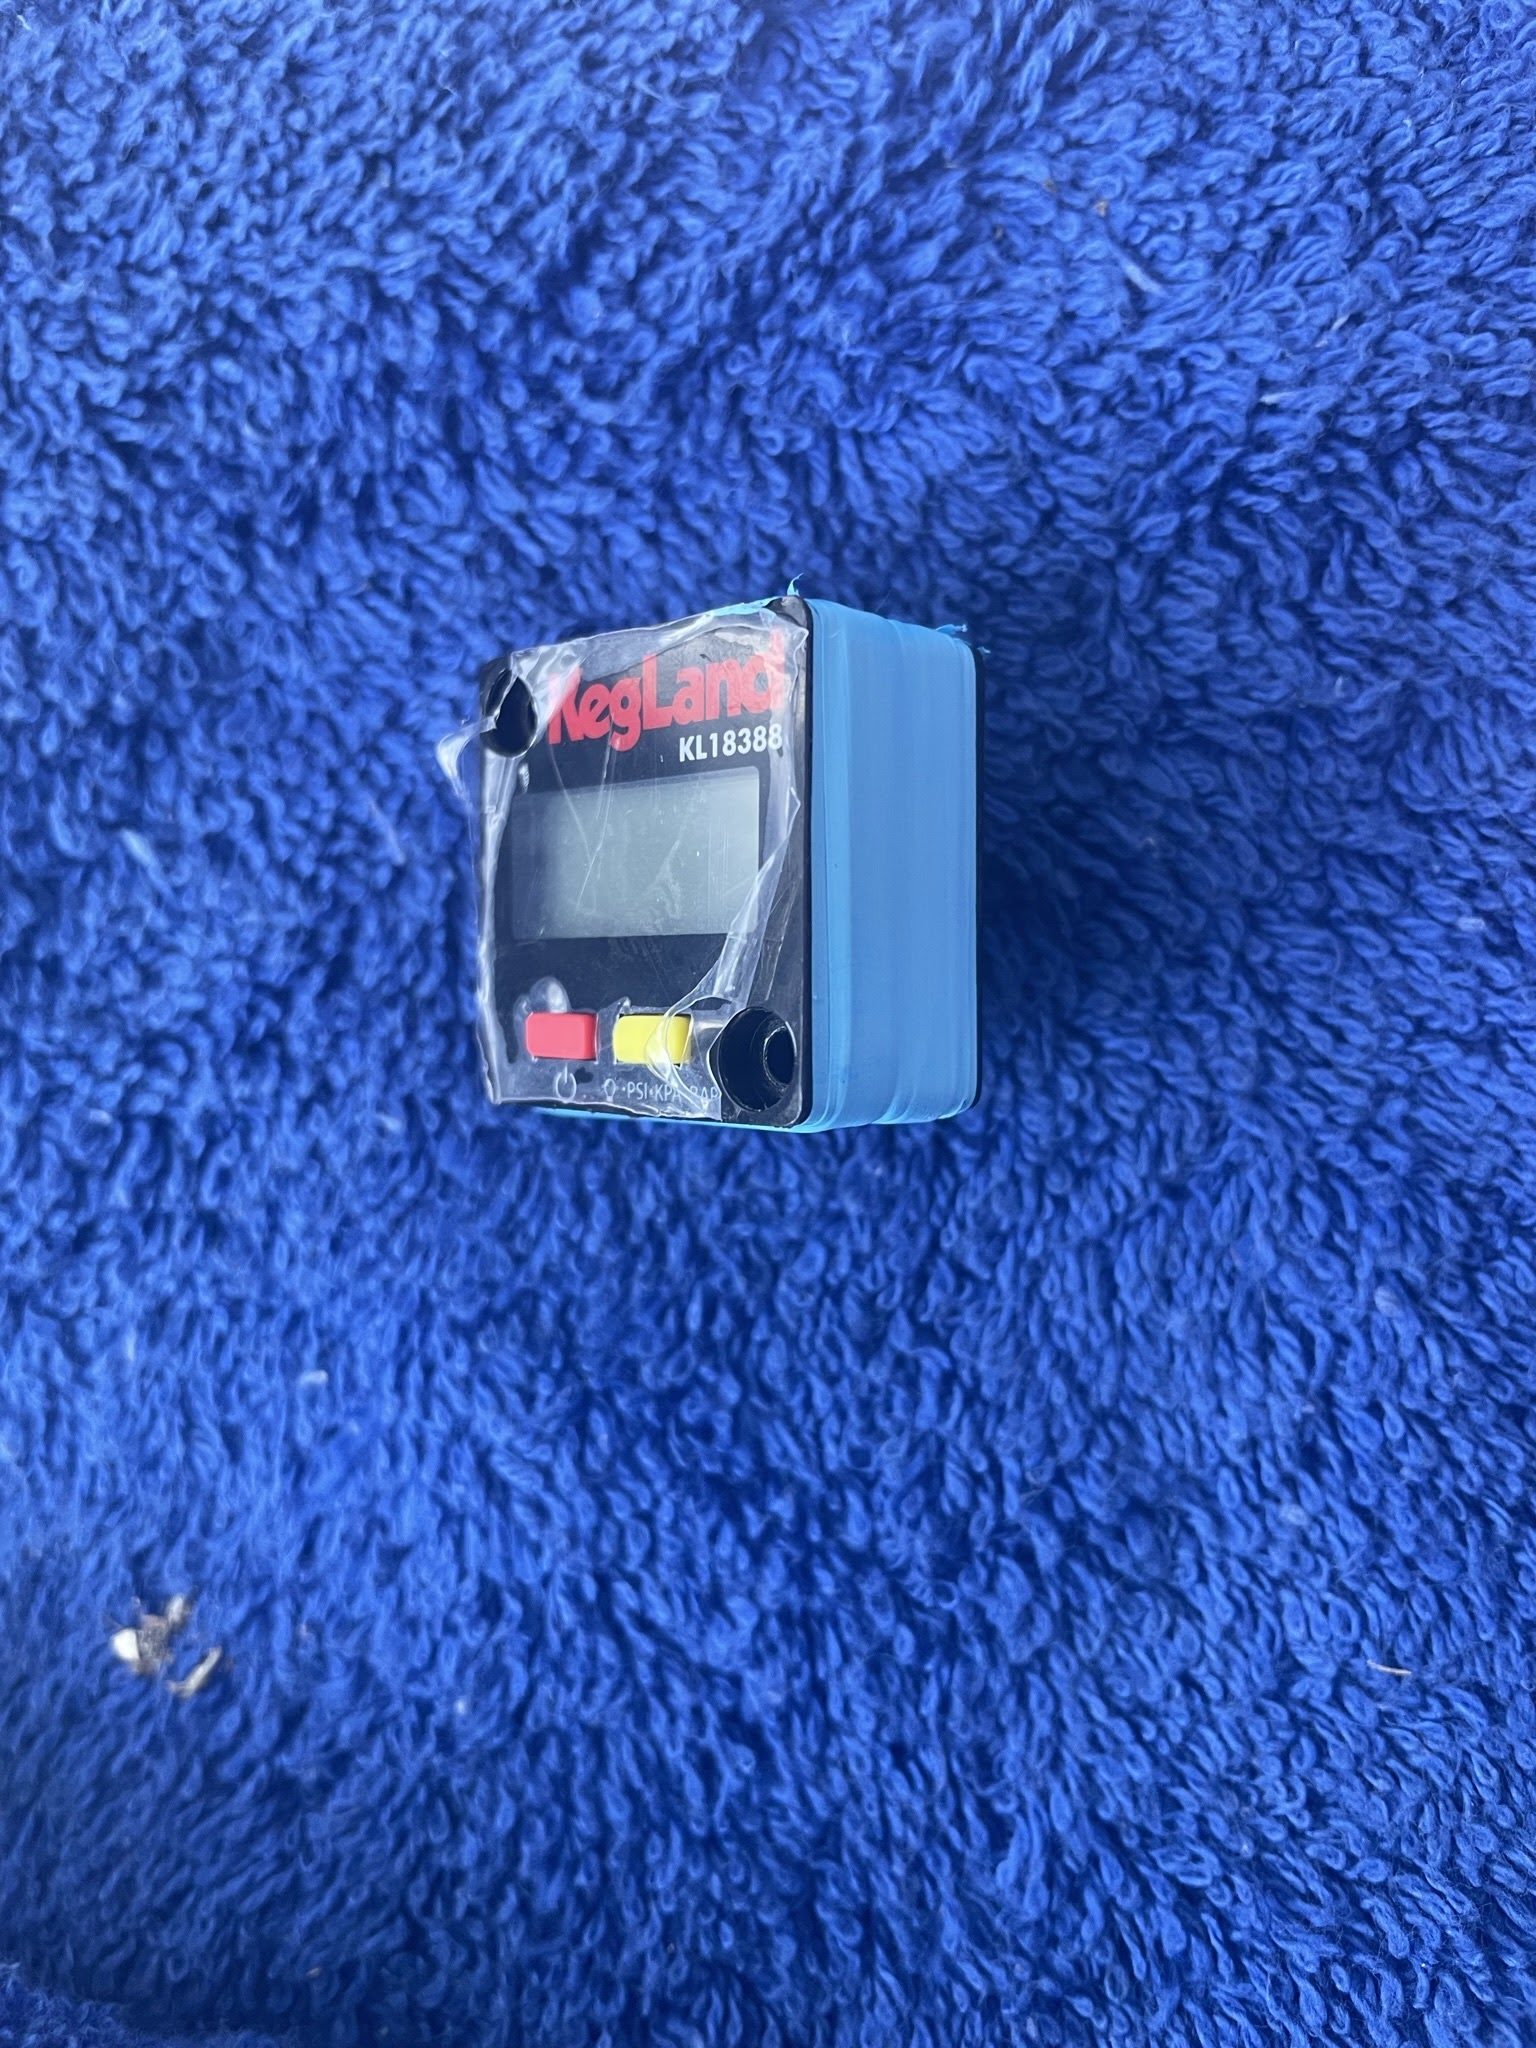
One of the most popular inline regulators currently available on the market is the KegLand Duotight Inline Regulator. They're relatively cheap and feature integrated Duotight connections (which have always worked well for us) meaning beer line can be inserted and locked into place without any additional adapters or fittings being required.
We also opted to upgrade the gauges in both regulators from the included 0-60psi analog gauges (accurate to +/- 10% of the gauge scale - so +/- 6psi) - quite a big difference when dealing with carbonation rates. We upgraded to the digital gauges which are much more accurate, and weve had good results after upgrading the gauge in our spunding valve to a digital gauge so we thought we'd give it a crack.
A quick note on installing the digital gauge, and that is to unscrew the 2 included nuts and bolts that come fitted to the digital gauge, and then fit the original screws that are included in the analog gauge when installing into the regulator. It's perhaps obvious to some, but this certainly isn't specified or detailed anywhere on the inline regulator product page.

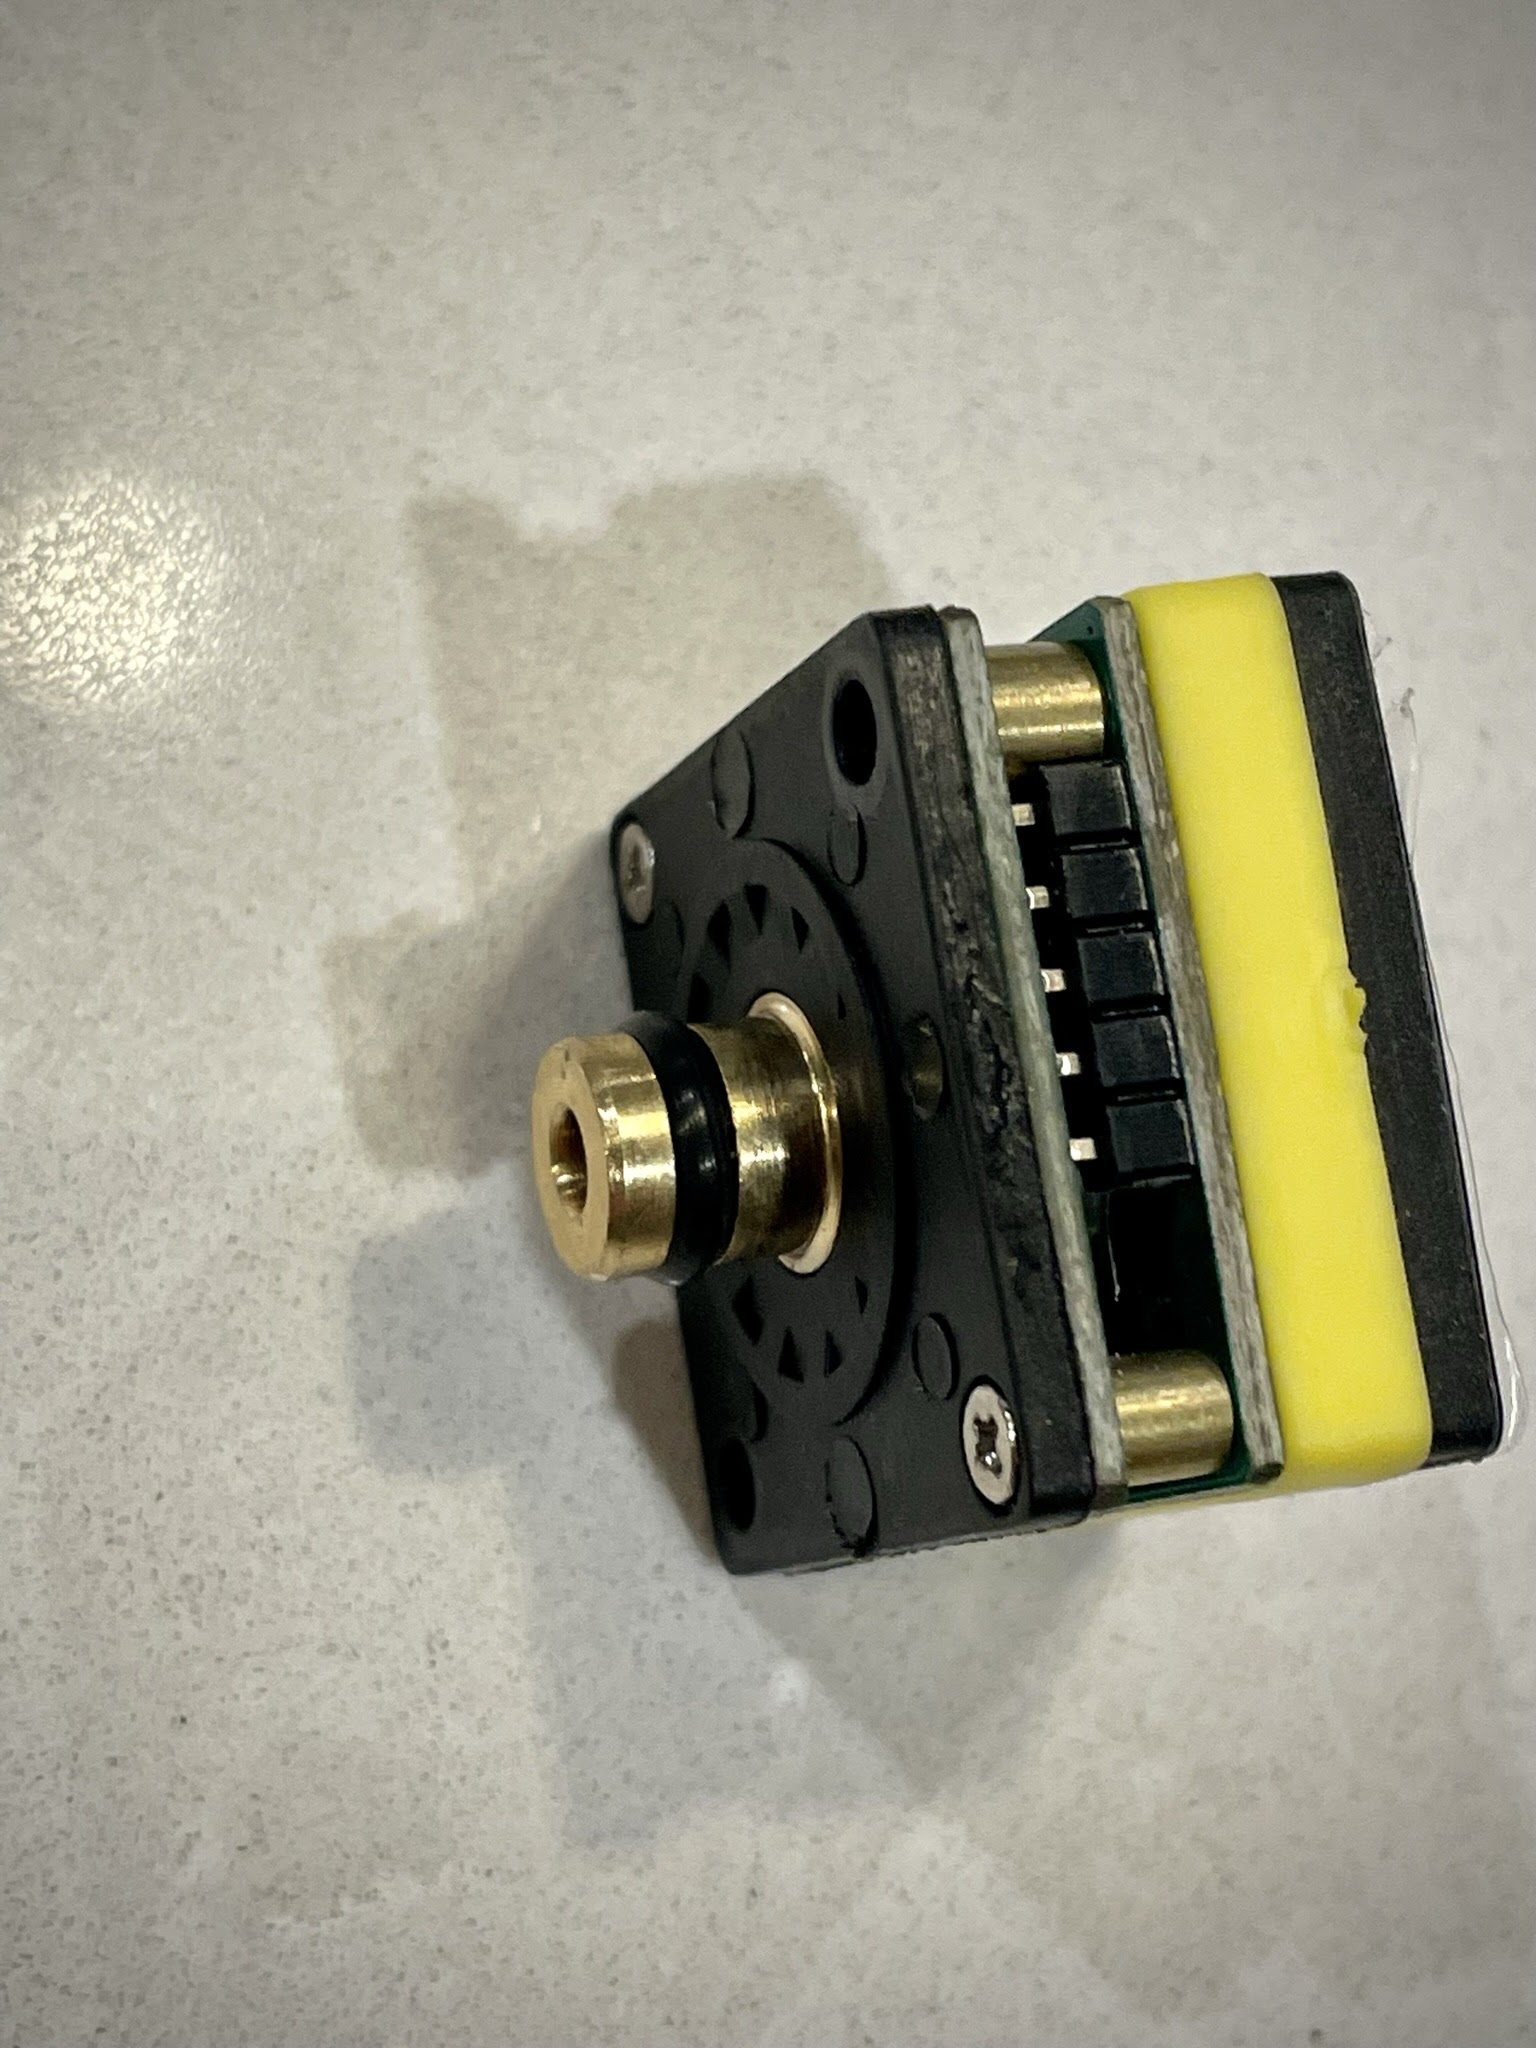
Leaving the original nut and bolts installed will not allow the gauge to be fully seated in the regulator as you can see from the picture below. Note how the yellow seal is partly visible and the gauge isn't sitting flush?

After screwing the gauge in place using the included screws from the analog gauge, you can see it's sitting much nicer in the regulator housing.

As we all know, when installing new equipment it's always a good idea to leak test first, and frustratingly we found that after isolating both of our new inline regulators, applying pressure through them and leaving them overnight, they were leaking down to almost 0psi every single time.
We went through the standard checks - made sure our gas line connections were cut square, with no rough edges or burrs which can affect the ability of the Duotight connections to seal properly. We of course checked our gas disconnects as well using the good old water submersion test to look for bubbles and came up with nothing. We even fitted our spunding valve (fully closed off) in place of a gas disconnect as we knew the spunding valve definitely didn't leak but still got the same leaking results.
We were certain at this point that the inline regulator itself was the culprit. We tried everything including fitting both the analog and digital gauges (thinking perhaps the gauge was leaking), and applied copious amounts of keg lube to the gauge stem seal to try and seal it off if it was indeed leaking from there.
Still the leaks persisted, and perhaps against our better judgement we opted to submerge the entire regulator under water (with the analog gauge fitted). A slow but noticeable flow of bubbles appeared from outside the gauge housing, indicating that gas was perhaps leaking out of here - presumably from around the gauge stem seal then out through where the gauge slides in.
Perhaps a little unorthodox, but we decided to attempt to wrap the digital gauge itself with thread tape or plumbing tape to better seal this part and prevent any gas from escaping out via this path.
After doing so, as you'd expect it's a bit of a tight fit to get the gauge back into the regulator, but after re-fitting and pressure testing, the results were noticed immediately. Where we'd see a drop of a few tenths of a PSI within a matter of minutes after applying pressure and shutting off the gas source, we found after doing this that the inline regulator was now holding pressure - hoorah!

There's perhaps a no more satisfying feeling than fixing a problematic leak like this - and after scouring internet forums and the KegLand user group on Facebook, it's apparent that many other brewers are experiencing this same problem with some not able to find a resolution and shelving their inline regulators - something we were admittedly not far away from doing ourselves.
Thinking about gas leaks logically, and there's only a few places on the inline regulator where the gas can leak from. The Duotight fittings, which we considered unlikely after checking our connections were all cut properly and clean and there was no evidence of this from our water submersion test.
The next most likely place was the gauge stem, and we must admit that we're surprised gas was still leaking out of here after all the lube we applied which typically helps with such problems.
In any case, hopefully this will help others who may be plagued and frustrated with a leaking inline regulator.


